Hope Blooms

Hope Blooms

Spellbinders Glimmer of the Month Club from February


Hi All! I finally had a chance to play with Februarys Glimmer of the Month kit from February. I try and get to each kit before the next one shows up! ( I subscribe to the Glimmer and their Small Die of the Month) They are so fun, versatile and priced pretty darn nice! For me, they give me a chance to create some cards that I am not coloring. Todays card turned out so elegant. I played around a lot with this hot foil plate before I came up with the card I made. Initially I wanted to color all the flowers, I even got it to foil on my Hammermill beautifully. (Yay! saving that trick for the future) But I was not happy with those results so I tried again and now, on with the Show & Tell…


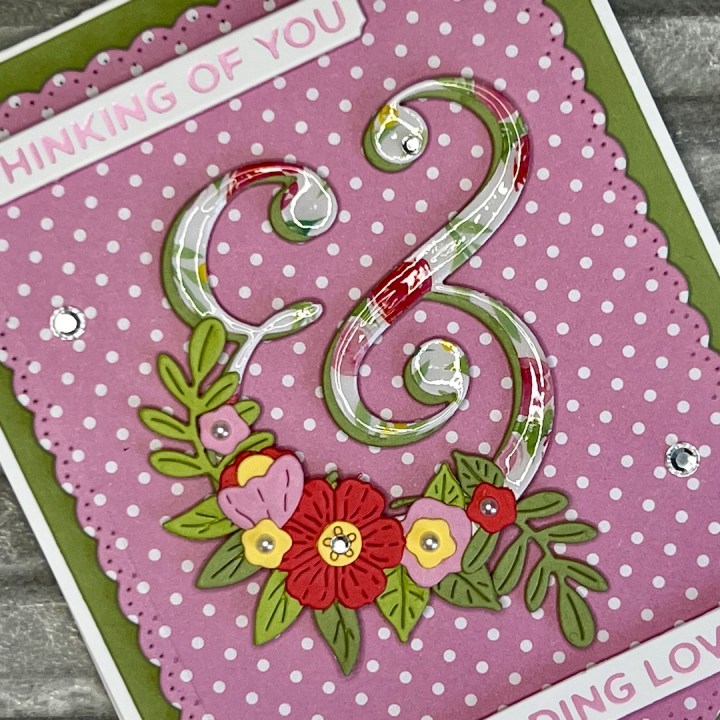
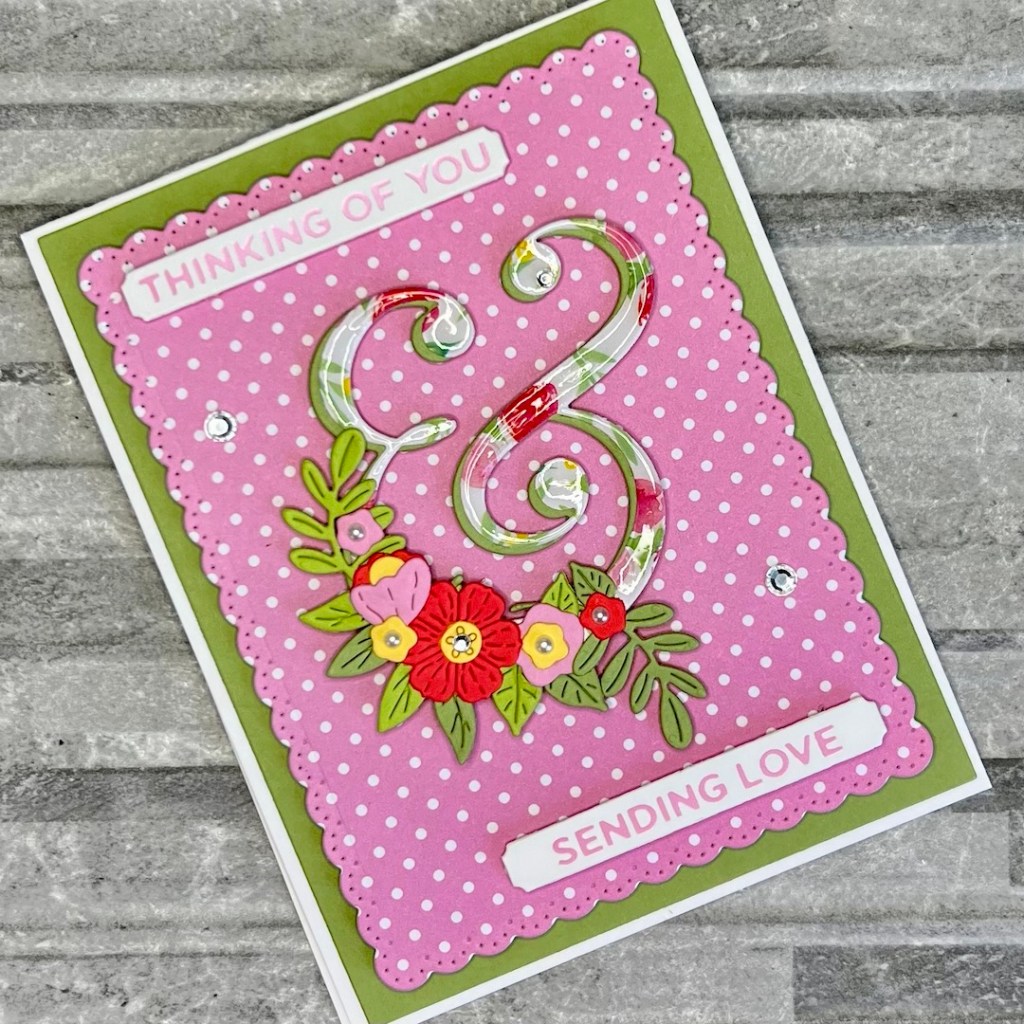
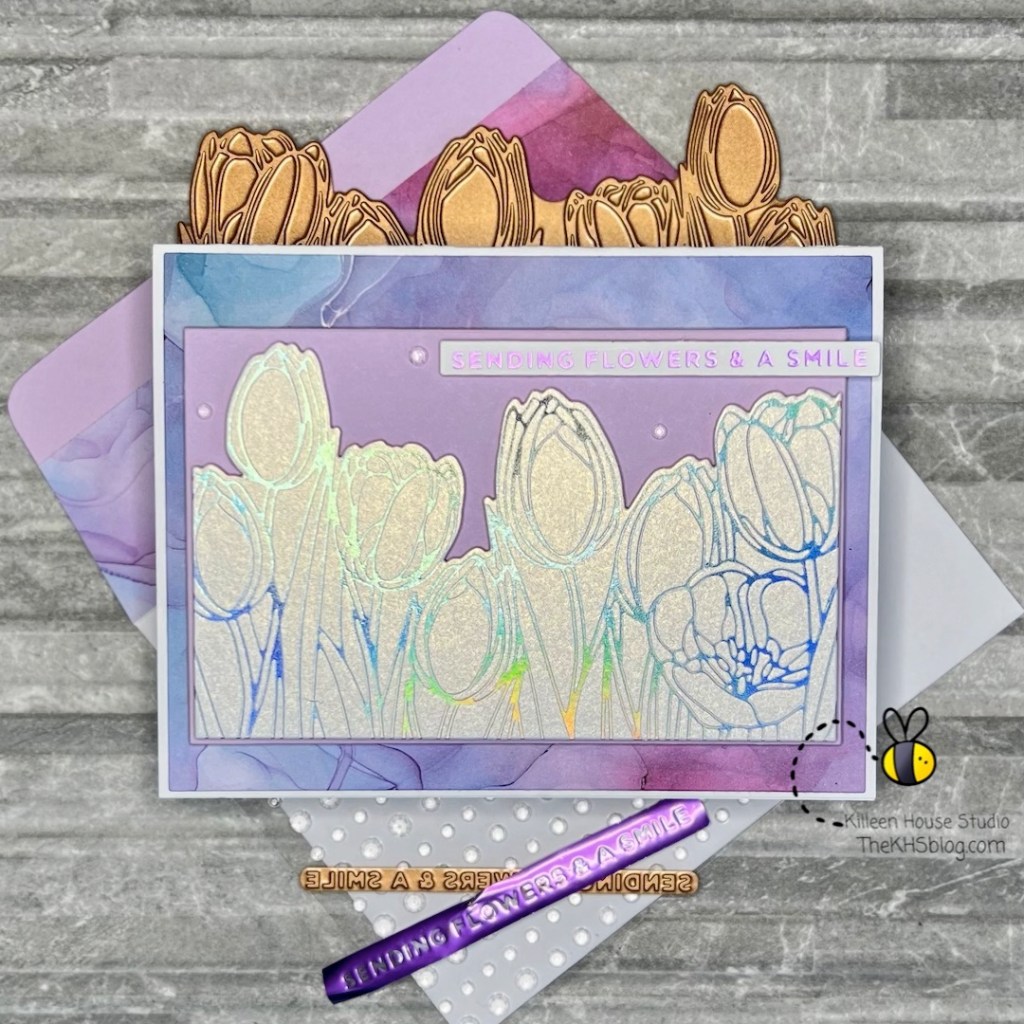
Prism foil on a glimmering paper!


The sentiment was foiled in Lavender Petal and picks up the Ink Drop paper nicely.


Other than the hot foil itself (which I consider an embellishment!) the only other embellie is the Honey Bee Crystal Clear Mix gems.

Card Details:

  • Cards base of Accent Opaque White 120lb
  • Craft Consortium Ink Drops Vivid cut with nesting rectangle, adhered with tape runner
  • Grapsicle layer cut with nesting rectangle, then cut a bit more, adhered with fun foam and 1/4 inch double side adhesive
  • Tulips hot foiled to pixie paper with prism foil, cut with coordinating top die and a nesting rectangle die, adhered with foam squares
  • Sentiment hot foiled on Glimmer Specialty paper with lavender petal foil, cut with coordinating die, word strip cut once from base paper and glued to foiled sentiment to firm it up, adhered with foam squares
  • Clear facet gems added for a touch of bling
  • Envelope embellished with matching. papers and 6 inch double side adhesive
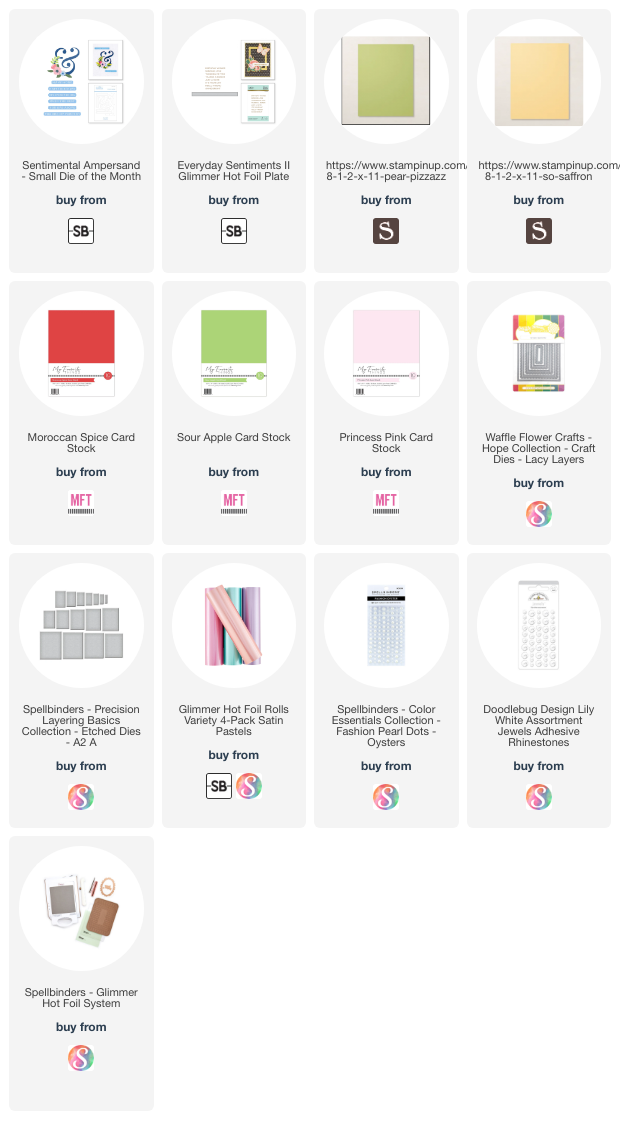
Shopping List:

Affiliate links have been used in this post at no cost to you. If you do happen to click and buy, I may get a small percentage.

Thank You for supporting my little blog.


If you would like to see all the basic items I like to use in my studio; like glue, tape runner, tools ect. Please click My Go-To’s.


Don’t want to miss a post? Sign up below to have them delivered right to your inbox!


Sentimental Ampersand

Sentimental Ampersand

Spellbinders Small Die of the Month January 2023


Hi All! I finally got around to using my SDOTM for January from Spellbinders. Did you know that Spellbinders has some really great club kits? I get the Small Die of the Month and the Glimmer of the Month. They are super fun and economical. I am always amazed at the price difference when they are available to the general public! Click here to check them out. Todays card is all die cutting and gluing. I have actually been doing a lot more die cut cards. If you don’t know, I teach a monthly card class in my community. I also sometimes have extra kits for sale from those classes. Check out my Local Classes page for more info. Now on with the Show & Tell…


The Ampersand was cut twice, once in Pear Pizzaz and once in the flowered paper. They were glued offset form each other, then after adding the die cuts I added 3D crystal lacquer JUST to the flowered pattern paper.


The sentiments are hot foiled in pastel pink. The color of this foil is amazing!


Pearls and Rhinestones for BLING!

Card Details:

  • Card base of Accent Opaque White 120lb
  • Pear Pizzaz layer cut with nesting rectangle, adhered with tape runner
  • Polka dot layer cut with Waffle Flower A2 Lacy layers die, adhered with fun foam and 1/4 inch double side adhesive
  • Ampersand cut from Pear Pizzaz and Flowered Paper (Craft Consortium Bright Blooms this is where the polka dot paper is from also) Glued offset from each other
  • Flowers and leaves cut from colored cardstock (colors in shopping list) they are all glued to the ampersand, 3D crystal lacquer added to flowered pattern paper, entire piece added to card with foam squares
  • Sentiments hot foiled in pastel pink, cut with word window, adhered with foam squares
  • Rhinestones and Pearls added for bling
  • Envelope embellished with matching paper and 6 inch double side adhesive

Shopping List:

Affiliate links have been used in this post at no cost to you. If you do happen to click and buy, I may get a small percentage.

Thank You for supporting my little blog.


If you would like to see all the basic items I like to use in my studio; like glue, tape runner, tools ect. Please click My Go-To’s.


Don’t want to miss a post? Sign up below to have them delivered right to your inbox!


Shop the Scrapbook.com Deals!