Good Morning! Welcome to my first Altenew Academy class blog. All About Layering 1.
I know! About time I started….. Anyway, I consider myself a pretty seasoned paper crafter. But lets be honest, 90% of the time I stamp an image outline and then hand color it. I generally do not purchase 2 or 3 step stamps. You know where they have LAYERS of stamped color. Hmmmm first three classes are ‘All About Layering”.
Challenge Accepted!
For my first class I chose to use Japanese Mum. Special thanks and a shout out to my friend Ramsey Alexander who graciously has
loaned me several Altenew stamp sets including this one.
Starting with my basic white card stock, I use Neenah Solar White in 100lb. I like a nice solid base. I added a layer of Bazzill Black Heavyweight Card Stock. (This is an awesome black paper.) Since I decided to do my flower in pinks I chose the lightest color and cut a coverplate with my Honeybee Stamps Watercolor Lines Coverplate. I adhered these together for my background.
Now for the challenging part. Let me tell you I went into this thinking ‘easy peasy”. Yeah well not so much! The hardest part for me was lining up each layer perfectly. A lot of people can eyeball this with no problem, me included. It is the part after you ink up the stamp and have to place it back down perfectly that got me! I decided I had better use my Stamparatus stamp positioner. You can also use a Misti…I have both sizes of that one too. Using the Stamparatus took the guess work out of it. You only have to line up the stamp dry on the paper.
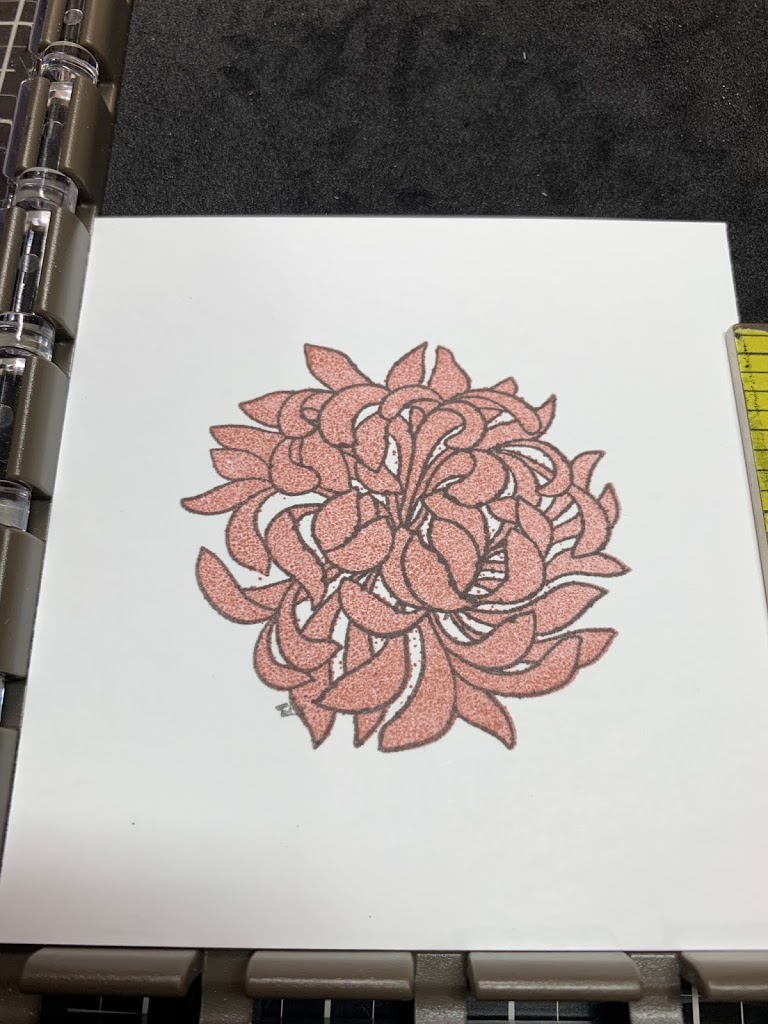
Before you add each layer of color place the stamp down on the image to align it correctly. Pick up the stamp with the plate of your positioner, ink it up and stamp. I chose to do the outline of my flower in Smoky Slate to keep the outline soft.
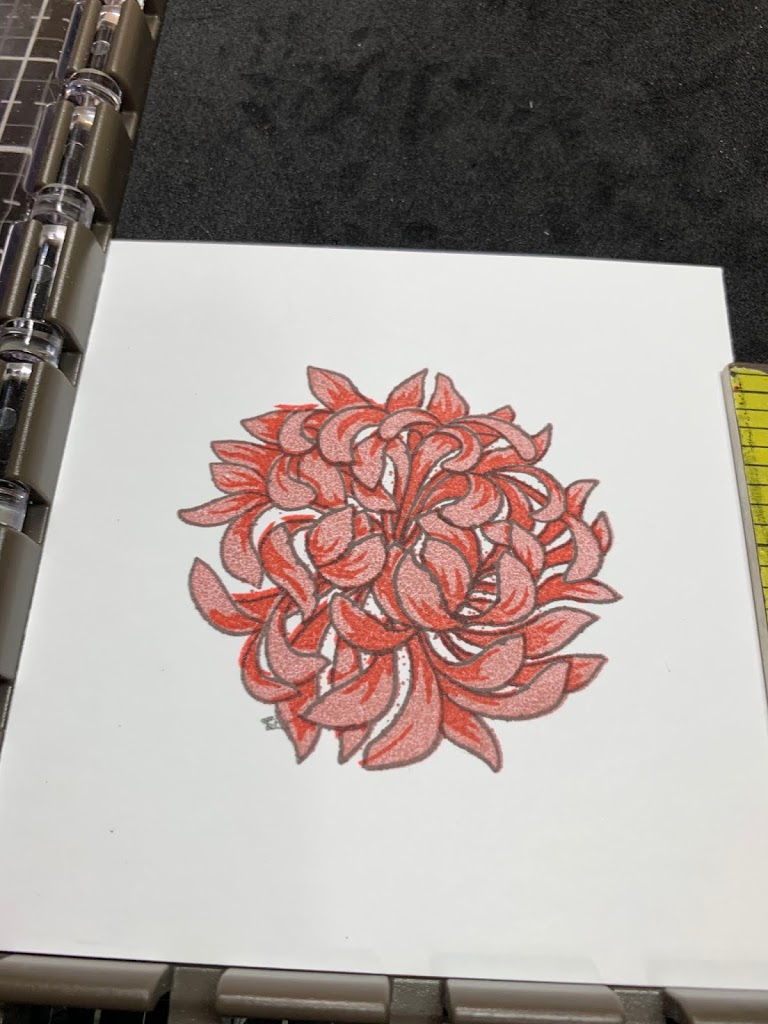
Three layers: outline, solid lightest color, sightly darker second step.

All three layers. The deeper last color layer really gives a lot of dimension!
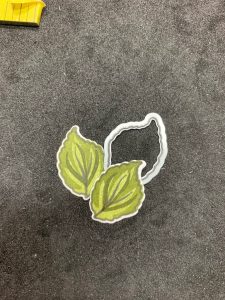
I did the same for the leaves using Brutus Monroe Raven for the outline and Stampin’ Up! Mossy Meadow, Old Olive and Pear Pizzaz for my three layering colors.
This set comes with coordinating dies making it super easy to cut out.
I wanted to have the sentiment blend in, so I chose to stamp it on a piece of vellum. Using Versafine and clear emboss powder, being very careful when heating it so as not to burn or curl the edges. I adhered it with Mystic Vellum adhesive. I attached the leaves to the back of the flower and then used foam squares to mount the flower and leaves, giving it dimension. For a finishing touch I added Honey Bee Stamps Dew Drops in Holly Berry. I like to affix these with Nuvo Deluxe Adhesive, and I use the Tanto Crystal Ninja pick up tool to handle them. This tool is the bomb!
I do hope you liked my first class card. I chose the sentiment just or you!
Clickable Shopping List

Like this:
Like Loading...
Share the fun!


Lol! Thank You!
Congratulations! You are a superb student! Gorgeous card! Way to go!